Introduction
Imagine this: you’re nestled in your cozy living room, relishing a peaceful evening, when suddenly, your gaze falls upon the ceiling. What you see is not a smooth, pristine expanse, but a haunting tapestry of unsightly blisters and bumps. Sheetrock tape, the unsung hero tasked with keeping your ceiling pristine, has betrayed you, leaving you with an aesthetic nightmare. Fear not, dear reader, for this comprehensive guide will equip you with the knowledge and tools to conquer this ceiling crisis and restore your home’s pristine beauty.

Image: www.youtube.com
Understanding Sheetrock Tape and Its Purpose
Sheetrock tape, also known as drywall tape, is a thin, self-adhesive mesh used to reinforce the joints between sheets of drywall. Its primary function is to prevent cracks and gaps from forming as the drywall expands and contracts due to changes in temperature and humidity.
Identifying the Culprits of Blistering Tape
Before embarking on a ремонтная миссия, it’s crucial to identify the root cause of your blistered tape. Common culprits include:
- Improper application of drywall compound
- Excess moisture in the air or walls
- Poorly sealed joints
- Structural movement or settling
Step-by-Step Guide to Erase Blisters
Now, let’s delve into the heart of the matter: how to banish those pesky blisters and restore your ceiling to its former glory.
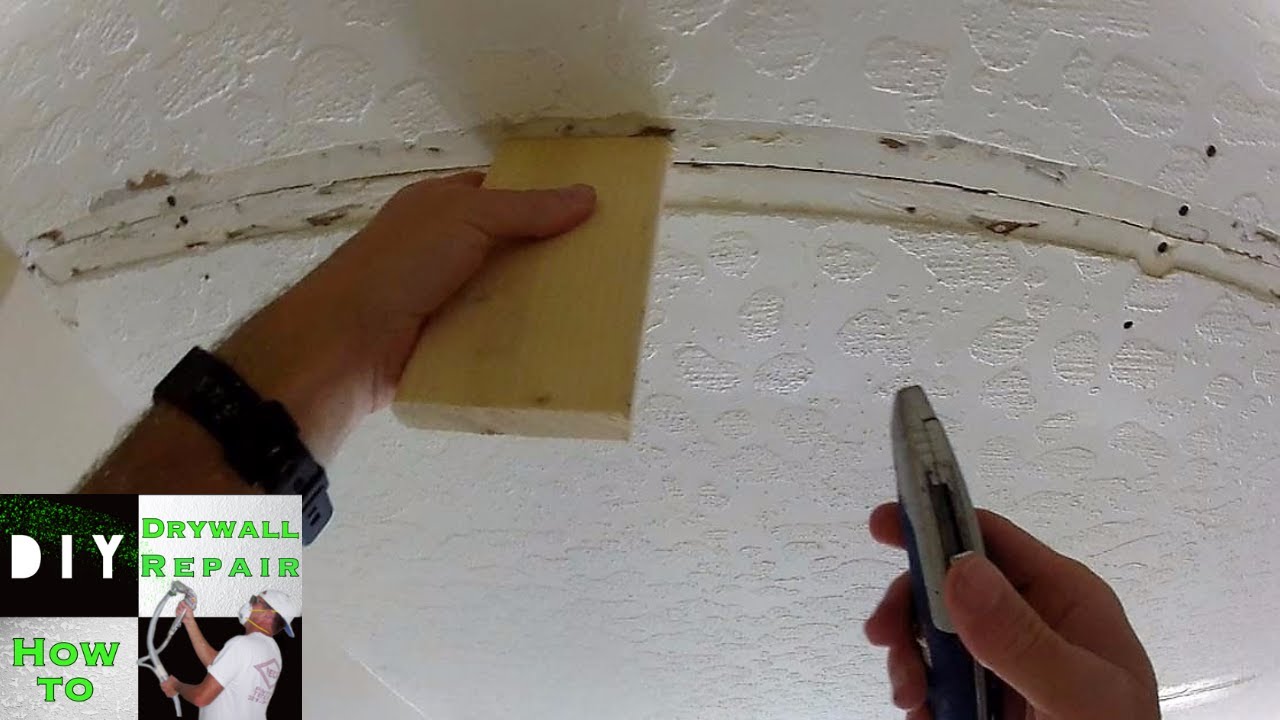
Image: www.youtube.com
Tools You’ll Need:
- Joint compound knife
- Sanding sponge
- Putty knife
- Caulking gun
- Compound primer
- Trowel or putty knife
- Paint (optional)
Step 1: Safety First!
Wear safety glasses and a dust mask while sanding.
Step 2: Remove Blisters and Loose Tape
Use a sharp knife to carefully cut away any blisters or loose tape. Be gentle to avoid damaging the drywall.
Step 3: Sand the Edges
Sand around the edges of the cut areas to smooth them out and create a feathered appearance.
Step 4: Apply Caulk
Fill any gaps or cracks around the joints with caulk. Smooth it out using a wet finger or putty knife.
Step 5: Apply Compound Primer
Apply a thin layer of compound primer over the sanded areas and caulk. This will help the new compound adhere better.
Step 6: Spread Joint Compound
Using a trowel or putty knife, spread a thin, even layer of joint compound over the primed areas. Feather the edges to blend them into the surrounding surface.
Step 7: Let Dry
Allow the joint compound to dry completely. Drying time will vary depending on the thickness of the compound, temperature, and humidity.
Step 8: Sand Smooth
Once the compound is dry, use a sanding sponge to sand the area until it’s smooth and flush with the surrounding surface.
Step 9: Apply Paint (Optional)
If desired, you can apply a fresh coat of paint to the repaired area to match the rest of the ceiling.
Expert Insights and Actionable Tips
Professional drywaller, Emily Carter, shares her expert advice:
“For a durable repair, use self-adhesive mesh tape and apply it before applying the drywall compound. This will add extra strength to the joint and prevent future blistering.”
Do-it-yourself enthusiast, John Wilson, adds:
“If you’re dealing with large blisters or damaged drywall, consider replacing the section rather than attempting a patch. This may require cutting out the damaged area and installing a new drywall patch.”
How To Fix Sheetrock Tape On Ceiling
Conclusion
With this comprehensive guide and newfound knowledge, you’re now empowered to tackle any sheetrock tape mishaps and restore your ceiling to its pristine condition. Remember, patience and care are key to a successful repair. Don’t hesitate to seek professional assistance if you encounter any challenges or have concerns about structural damage. By following these steps and embracing the spirit of DIY, you’ll be able to fix sheetrock tape on ceiling like a pro, transforming your home into a haven of smooth, blemish-free ceilings.
