Introduction: The Perils of Lead
Lead, a toxic metal, has been used for centuries in the construction of plumbing systems. While lead pipes were once ubiquitous, their harmful effects on human health have led to their gradual replacement in most parts of the world. However, many older homes and buildings still have lead pipes, which can pose a significant health risk, especially to young children. Lead exposure can cause a range of health issues, including developmental delays, organ damage, and reproductive problems. If you suspect that you may have lead pipes, it is crucial to take action to mitigate the risks. Fixing a leaking lead pipe is an essential step towards protecting yourself and your family from lead exposure.

Image: www.harriswaterproofing.ca
Step 1: Identify the Leaking Pipe
The first step in fixing a leaking lead pipe is to identify its location. Lead pipes are typically gray or bluish-gray in color and have a dull, matte finish. They are often found in basements, crawlspaces, or under sinks. Once you have identified the leaking pipe, take note of its size and location to help with the repair.
Step 2: Gather the Necessary Tools
Before you begin the repair, gather the necessary tools and materials. You will need:
- A pipe wrench or adjustable wrench
- A hacksaw or pipe cutter
- A length of replacement pipe (copper or plastic)
- Coupling nuts or compression fittings
- Plumber’s putty
- A flashlight (if working in a dark area)
Step 3: Shut Off the Water Supply
Before you start working on the pipe, be sure to shut off the water supply. This is typically done by turning off the main water valve, which is usually located in the basement or crawlspace. If you are unsure where the main water valve is located, consult a licensed plumber.
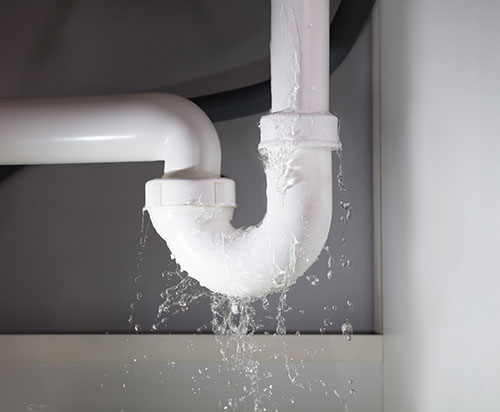
Image: www.dbirtlesplumbing.co.uk
Step 4: Drain the Pipe
Once the water supply is shut off, you need to drain the remaining water from the pipe. To do this, open a faucet downstream of the leak. This will allow the water to drain out of the pipe.
Step 5: Cut Out the Leaking Section
Using a hacksaw or pipe cutter, cut out the leaking section of the pipe. Be sure to make clean, straight cuts.
Step 6: Clean the Ends of the Pipe
Clean the ends of the pipe with sandpaper or a wire brush to remove any burrs or debris. This will ensure a good seal when you connect the replacement pipe.
Step 7: Apply Plumber’s Putty
Apply a ring of plumber’s putty around the end of the replacement pipe. This will help to seal the joint between the new pipe and the old pipe.
Step 8: Insert the Replacement Pipe
Insert the replacement pipe into the old pipe. Tighten the coupling nuts or compression fittings to secure the connection.
Step 9: Turn on the Water Supply
Turn the water supply back on and check for leaks. If there are any leaks, tighten the connections until they stop.
Step 10: Call a Licensed Plumber (Optional)
If you are not confident in your ability to fix the leaking pipe yourself, it is best to call a licensed plumber. A plumber can quickly and safely repair the leak and ensure that the repair is done properly.
How To Fix A Leaking Lead Pipe
Conclusion
Fixing a leaking lead pipe is an important step towards protecting yourself and your family from lead exposure. By following these steps, you can safely repair a leak and reduce your risk of lead exposure. If you are unsure about any of the steps involved in fixing a leaking lead pipe, do not hesitate to consult a licensed plumber.
