Introduction
RV interior trim molding serves both functional and aesthetic purposes within your RV. Not only does it provide a sleek and finished appearance to walls, ceilings, and cabinetry, it is also utilized to conceal seams, protect edges from moisture infiltration, and enhance durability. When trim molding buckles, sags, or becomes damaged, it can detract from the overall beauty and functionality of your RV interior. This guide will explore various methods to effectively repair or replace RV interior trim molding, empowering you to restore the pristine condition of your living space on wheels.
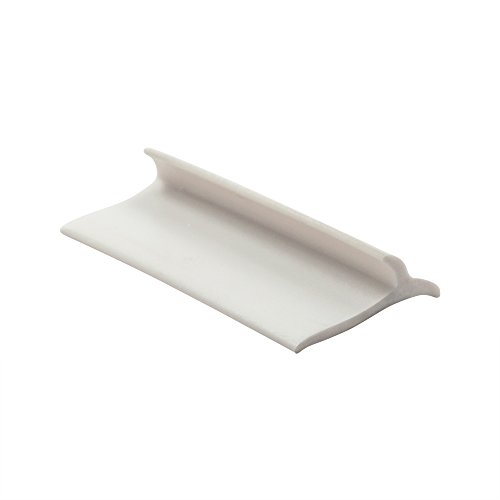
Image: teletalkbd.com
Whether you are a seasoned DIY enthusiast or a novice looking to tackle a minor repair, we will delve into the specific steps involved in fixing RV trim molding. By carefully following the techniques outlined and incorporating proper materials, you can successfully rectify issues such as loose moldings, chipped edges, and unsightly gaps. Let us embark on this journey of restoring your RV’s interior trim molding to its former glory.
Identifying the Type of Trim Molding
The initial step in repairing or replacing RV interior trim molding is to ascertain the type of material it is made from. Common types include wood, plastic, and vinyl. Accurately identifying the material composition is critical as it determines the appropriate repair or replacement approach.
Wooden trim molding is known for its classic appearance and durability. However, it is susceptible to warping and damage if exposed to moisture.
Plastic trim molding is a popular choice due to its affordability, ease of installation, and resistance to moisture.
Vinyl trim molding offers similar advantages to plastic molding but is more flexible, making it suitable for curved surfaces.
Tools and Materials for Trim Molding Repair
Before commencing the repair process, ensure you have the necessary tools and materials for the job. These include:
- Pry bar
- Hammer
- Measuring tape
- Wood filler or plastic caulk
- Sandpaper
- Paint or stain (for wooden trim)
li>Level
Repairing Loose Trim Molding
Loose trim molding can occur due to vibrations during travel, temperature changes, or improper installation. To repair loose trim, follow these steps:
- Gently pry the loose trim away from the wall or ceiling using a pry bar. Do not pry too forcefully, as this can damage the trim or underlying surface.
- Inspect the back of the trim and the area where it was attached for any damage or debris.
- Clean the surfaces of the trim and the mounting area with a damp cloth. Allow them to dry completely.
- Apply a generous amount of wood filler or plastic caulk to the back of the trim. If the trim is wooden, use a paintable wood filler that dries to match the surrounding wood. For plastic or vinyl trim, use a clear or white plastic caulk.
- Align the trim with its original position and press it firmly into place. Use a level to ensure that the trim is straight and level.
- Use a hammer and small nails or staples to secure the trim in place. Countersink the nails or staples slightly below the surface of the trim.
- Wipe away any excess wood filler or caulk that may have squeezed out during installation.
- If desired, touch up the repaired area with paint or stain to match the surrounding trim.

Image: best-interior.netlify.app
Replacing Damaged Trim Molding
If the trim molding is severely damaged or cannot be repaired, it will need to be replaced. Here are the steps for replacing trim molding:
- Remove the damaged trim molding by prying it away from the wall or ceiling as described in the previous section.
- Measure the length of the damaged trim and cut a new piece of trim to the same length.
- If the new trim is wooden, stain or paint it to match the existing trim before installation.
- Apply a bead of wood filler or plastic caulk to the back of the new trim.
- Align the new trim with the original position and press it firmly into place. Use a level to ensure that the trim is straight and level.
- Secure the trim in place with nails or staples.
- Wipe away any excess wood filler or caulk
How To Fix Rv Interior Trim Molding
Conclusion
Restoring the trim molding in your RV’s interior not only enhances the aesthetic appeal but also ensures the longevity and functionality of your living space. By understanding the different types of trim molding and the appropriate repair or replacement techniques, you can confidently tackle these tasks and maintain the pristine condition of your RV.
Remember, if you encounter any significant damage or have concerns about DIY repairs, do not hesitate to consult a qualified RV repair technician. Their expertise will ensure a professional and lasting restoration.
