Introduction

Image: arthurglosmandds.com
Veneer, a thin layer of wood applied to a substrate, adds elegance and warmth to any home. However, like all other materials, veneer can become damaged over time, leading to unsightly lifting and peeling. While this issue can be frustrating, it’s important to know that fixing lifting veneer is a feasible task with the right knowledge and tools. In this comprehensive guide, we will delve into the causes of veneer lifting and provide step-by-step instructions on how to repair it effectively.
Understanding Veneer Lifting
Veneer lifting occurs when the adhesive bond between the veneer and the substrate weakens, causing the veneer to detach and curl. This can be caused by various factors, including:
- Humidity changes, leading to expansion or contraction of the veneer
- Water damage, weakening the bond between the veneer and substrate
- Heat exposure, causing the adhesive to melt
- Improper installation, such as using the wrong type of adhesive
- Aging and deterioration of the adhesive
Materials and Tools Required
Before starting the repair process, gather the necessary materials and tools:
- Veneer adhesive
- Clamps
- Sandpaper
- Veneer scraper
- Putty knife
- Hammer
- Nails (optional)
Step-by-Step Repair Guide
1. Prepare the Veneer and Surface:
- Remove any dirt or debris from the lifted veneer and the surrounding area.
- If the veneer is badly damaged, use a veneer scraper to carefully remove the loose pieces.
- Sand the edges of the lifted veneer to create a smooth surface.
2. Apply Adhesive:
- Apply a thin layer of veneer adhesive to both the underside of the lifted veneer and the surface of the substrate.
- Use a putty knife or brush to spread the adhesive evenly.
3. Reposition the Veneer:
- Carefully align the lifted veneer over the prepared surface and press it down firmly.
- Use clamps to hold the veneer in place, applying even pressure across the entire surface.
4. Secure the Veneer (Optional):
- For added stability, you can use small nails to secure the veneer further.
- Hammer the nails gently at an angle into the substrate through the veneer.
5. Clean Up and Finishing:
- Remove any excess adhesive with a damp cloth.
- If nails were used, hammer them in flush with the surface.
- Allow the adhesive to dry and cure completely, following the manufacturer’s instructions.
Expert Insights and Tips
- Use an adhesive specifically designed for veneer repair, as it provides strong bonding.
- Clamp the veneer in different directions to ensure even pressure during the drying process.
- If the lifted veneer is large, it may be beneficial to use a vacuum press for optimal bonding.
- Allow ample drying time for the adhesive to cure properly. This may take anywhere from a few hours to a day.
- If the lifting is extensive, consider replacing the entire veneer rather than repairing it.
Conclusion
Fixing lifting veneer requires patience and precision. By following the steps outlined in this guide and incorporating the tips from experts, you can effectively repair the damaged veneer and restore its original beauty. Remember, maintaining the proper humidity level and avoiding heat and water exposure can help prevent future veneer lifting issues. If the repair proves to be too challenging, don’t hesitate to consult a professional for assistance.
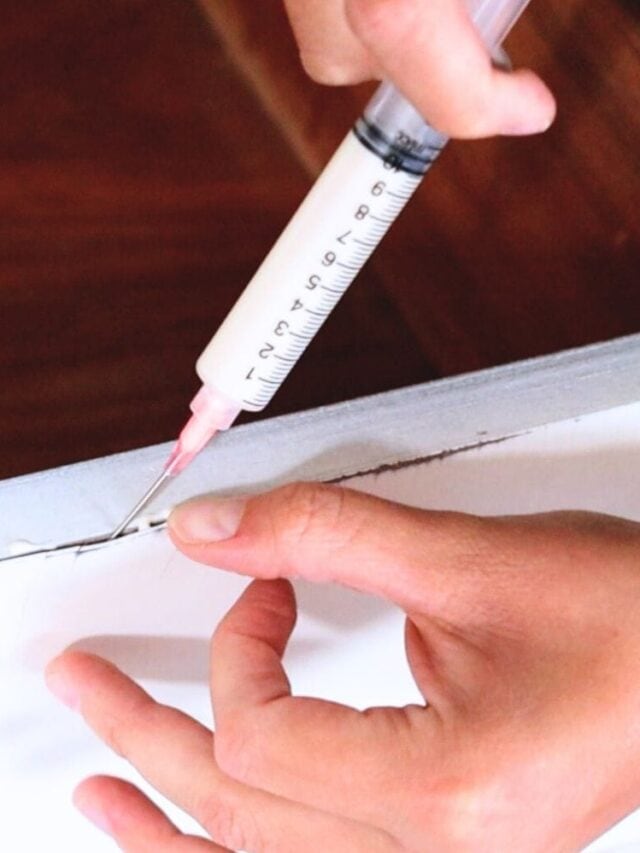
Image: arayofsunlight.com
How To Fix Veneer That Is Lifting
